Dec 5, 2010

sangria


I made sangria for the first time EVAR for a potluck this past weekend! I scoured the internetz for inspiration, remembered a few tasty sangrias I'd had in the past, and whipped up my own concoction (I like to keep things complicated.. simplicity sucks).

Here's the recipe. It makes about 5L of not-super-boozy sangria:
1L red wine
1 orange, sliced
1 lime, sliced
1 grapefruit, sliced
1/2 cup of raspberries (I'd probably omit these in the future. they got kinda gross in the bottom of the jug).
half a jar of maraschino cherries + a bit of the juice

1L of water
1/2-1 cup of grenadine
3/4 can of frozen mango punch concentrate (any punch could probably be substituted)

1 cup of peach schnapps
1/2 cup of triple sec
1/2 a can of frozen pink lemonade concentrate
3/4 of a can of frozen orange juice concentrate
2 cups of water (to turn the frozen concentrate into juice)


1. 24 hours ahead of time, mix the wine and fruit in a jug and store it in the fridge.
2. At least 12 hours ahead of time, make the ice cubes out of juice, water, and grenadine: mix the frozen concentrate plus the water and pour into 4 ice cube trays. Pour the grenadine into the tray (if you're good, you can get layered ice cubes, not that anyone will look at the ice cubes that closely).
3. At least 12 hours ahead of time, add the extra alcohol and juice
4. At the last minute, add the ice to the jugs and serve!

Oct 31, 2010

recipe: borscht


My dad had a large veggie garden when I was growing up, and one of the vegetables we always had great success with was beets. So we'd harvest a bunch, boil 'em up, and eat them warm with a really simple serving of white vinegar, salt, and black pepper. This has somehow resulted in a strong fondness for beets.

So when I saw a large bag on sale, I decided to take the plunge and buy 'em. Now I'm stuck with > 10 lbs of beets and I pretty much only like them served in the way of my childhood. Sooo now I have the challenge of trying to figure out what to do with beets. Enter borscht.

I've never made borscht before. In fact, I've never even tasted borscht before. I don't even know what it's supposed to taste like. But this morning I searched the internetz and stole some ideas from four different recipes I found, and came up with my own borscht recipe. And whadda ya know, it tastes pretty good. I don't know how "authentic" it is, but it's pretty damn yummy (if you like beets, cabbage, and potatoes). So here it is, for your viewing pleasure.

Some notes: This recipe is slightly different from what I actually did. I was such a fan of the mashed potato step that I increased the amount of mashed potatoes below (today I actually only used 3 small potatoes for the mashed amount whereas below I suggest you use 2-3 medium potatoes). Additionally, if I were going to make this soup again, I would probably add 2 cloves of garlic when I add the carrots/celery/potatoes. I love my garlic. Lastly, I don't have cheesecloth, so I created the below (somewhat convoluted) way of flavouring my broth with spices. If you are cooking in a well-equipped kitchen and actually have cheesecloth, by all means stuff the first 6 ingredients into a little bundle of cheesecloth and save yourself the step of scooping potatoes and then draining broth. (see this recipe for how that works)

Nicole's Borscht
Ease: 3 somewhat easy
Time: 4 somewhat time consuming (lots of chopping, two different pots going on, three major steps. but worth it for a soup that is a whole meal!)
Ingredients: easy to get
Source: Inspiration from the following four websites, in approximately the order of importance:

Ingredients:
  • 1 bay leaf (or more, if you like)
  • 1 tsp black peppercorns
  • 1/8 tsp mustard seeds
  • 3 sprigs fresh parsley
  • 3 sprigs fresh thyme
  • 2 cloves of garlic, crushed with the side of a knife
  • 2-3 medium potatoes, very coarsely chopped
  • at least 7 cups of water/veggie broth, divided (4 cups plus 3 cups); the final amount will be up to your personal taste.
  • 3 Tbsp + 1 Tbsp oil (I used olive)
  • 1 onion, sliced
  • 2 carrots, julienned
  • 1 stalk celery, diced
  • 1-2 potatoes, diced
  • 1 cup of canned diced tomatoes with juice
  • 6 medium-large beets, peeled and julienned
  • 2 Tbsp red wine vinegar (plus more to taste)
  • 1/2 a head of green cabbage, finely sliced
  • 1/4 cup cooking cream
  • 1 Tbsp margarine
  • 2 tsp salt
  • 1 Tbsp sugar (I used a mixture of half brown, half white)
  • 1 Tbsp dried dill
  • 1 Tbsp dried parsley
  • 1 tsp black pepper
  • Sour cream (optional)
  • Fresh dill (optional)

Directions:
  1. In a large pot, boil 4 cups of broth with bay leaf, peppercorns, mustard seeds, parsley, thyme, and garlic (use the cheesecloth bundle if you have cheesecloth!). Add potatoes and cook until soft.
  2. Meanwhile, in a LARGE frying pan, fry onions in 3 Tbsp of oil until brown. Add carrots, celery, and potatoes and cook for 3 more minutes.
  3. Add diced tomatoes and beets to the frying pan. Add the vinegar right away ("to keep the colour and taste of the beets", whatever that means). Cook while you do the next step.
  4. Scoop out your boiled potatoes into a separate bowl and mash with the margarine and cream. Drain your flavoured broth through a strainer into a bowl (i.e. RESERVE THE BROTH because you're using it in your soup!). Pour the reserved broth back into the large pot and add all the veggies from the frying pan into the pot. (If you were using the cheesecloth method, all you'd need to do here is remove the cheesecloth bundle and scoop out the potates to mash. no straining involved).
  5. Add a bit more oil to the frying pan and cook the cabbage until it's a bit tender.
  6. While the cabbage is cooking, mix the broth & veggies, then add the mashed potatoes and the salt, sugar, dill, parsley, and black pepper.
  7. Add the cabbage to the pot (yes, you can put your frying pan in the sink now. We're done with it). Stir the soup well and cook, covered, for approximately 20 minutes until you see how much liquid the veggies release.
  8. After the 20 minutes is up, check on your soup and add extra broth/water until your soup has the veggie:liquid ratio you like. Put the lid back on and cook for at least 1 hour.
  9. Optional step (I didn't take this step): Remove some of the soup and blend it, then return it to the pot. This will yield a thicker soup.
  10. Serve with sour cream. And fresh (or dried) dill if you like.

May 16, 2010

crafts: recent finished (bébé) objects

I'm gonna be an aunt really soon (what do y'all think of Auntie Nicki?), so I spent a few months making loads of baby stuff for little Sofie. I finally gave (most of) it to Trevor & Jenna, so I feel like I can post it. One item has not been given but I don't think either of them read my blog so... I don't like this is going to spoil anything :)

Snug booties


Vanille slippers (named because I was watching kyle play FFXIII while I made them and the colour matches her hair - "her" being a character in the game, not Sofie!)


Backstrap sandals


Periwinkle Kimono

I'm also going to make some Japanese style booties/baby slippers to go with this... soon... when I have time...

First (and last?) raggy quilt (also for Sofie)


Stuff that isn't for Sofie...
Flame Sandals (not sure who these are for yet...)


And my first tunisian project, a square for a swap I'm doing.

May 2, 2010

photos: gritty dramatic tutorial

Kyle and I have decided to try out at least one Photoshop tutorial per week in the hopes that it'll teach us new skills and potentially generate some neat results.

Today's tutorial was Dramatic Gritty Effect. Kyle chose a photo I took at the Toronto Zoo, and I chose a photo I took from the train in Cuzco, Peru. I like Kyle's result, but not mine! I tried again on my own, using a second photo of Cuzco. I think I like the second one better.

Before: Just a bit of my normal photo-enhancing techniques (contrast, levels, etc)


After: My dramatic gritty effect.


Before: No treatment.


After: Kyle's dramatic gritty effect.


Before: Some of my basic photo-enhancing techniques.


After: My second attempt at dramatic gritty effect.

Apr 28, 2010

photos: fun with photoshop

I went birding this past Saturday and finally got some use out of my new digital SLR. I didn't find myself terribly inspired, but I managed to take over 200 photos anyway. I've since been toying with a few of them in Photoshop and I've reminded myself how much I love playing with photos.
Here are a couple of comparisons. The first three are just my typical colour-correcting, make-this-photo-a-wee-bit-more-dramatic suite of changes.

casual birders
cedar path


Then I had a beer with dinner tonight and got a little overly creative with the next three. The first is a photo from Arizona, supplied by my friend/labmate Christian. The second and third were from Saturday's birding trip, with a few techniques from 70's/vintage tutorials.
Photo 015
Saguaro - corr crop


I think my favourite is actually Christian's shot, and I kind of wish it was my photo to begin with :)

I'm hoping to start trying out new tutorials each week so I can learn new techniques. Would you - yea you! - be interested in some sort of tutorial-following photo-editing-a-long? We could take turns picking tutorials and then we share the results... somewhere. Could be fun.

Apr 22, 2010

photos: how to use flickr

piqûre
piqûre, by me

Last fall, prompted by something I read about "How to get Noticed" (as a photographer), I made the decision to start using Flickr as a place to showcase my best (and favourite) photos (I separate best from favourite since I sometimes like photos that are not objectively very good). Previously, I had been using Flickr for general photosharing as well as showcasing my "best work". Although I never did delete my older "check out the photos of me and my friends hanging out at 70s disco party", because I wasn't sure if this only post your best kick would stick).

ethereal
hyrule, by me

I've since talked myself into thinking that it's silly to only post my "best" because really... my "best" isn't very good... so why limit myself to only a few images? It's convenient to put photos on flickr for use on my blog and/or Ravelry. So I started putting my yarn photos on Flickr. However, in the past two days, I have been questioning this decision. I've been spending a lot of time looking at my own flickr photos lately, and every once in a while I'll come across a picture and think "hey that one is pretty good", so I wonder if maybe I should only put up the ones I'm proud of.

I don't have an answer. I haven't made a decision. I really enjoy taking the time to pick out my favourite photos and tweaking them in Photoshop to highlight certain aspects. I also like writing a bit of a story for each individual photo. Both actions are near impossible (and pointless?) for mass uploads.

Do you use flickr? For what? Any input for me?
Feel like nosing around my photos before making a comment? Check out my sets.
untitled, by me

Apr 10, 2010

crafts: centre-pull yarn ball

centre-pull red
centrepull, by me
I stumbled across a thread on Ravelry the other day about How to make a Centre-pull Ball. I was like "wtf?" But I checked it out, followed the links, and decided to give 'er a try. Turns out I love making centre pull balls, and I want to center-pull ballerize my entire stash. I took some photos of the process, because I think it's not entirely easy to follow when you just read it in words. I've seen hand-winding mentioned a few times on Ravelry, most notably here: Hand-winding (that thread has a video too!)
I like centre pull balls because they don't roll around the floor for kitties to go nuts about. Plus there's something exciting about turning a chaotic mess of yarn into a neatly wound, self-contained, regularly shaped "ball".
I basically found 3 hand-winding techniques:
  1. Pill bottle
  2. Toilet paper roll
  3. Thumb
All are described here.
Here's my version of the thumb method:
tutorial
tutorial, by me
  1. grab about 6" of yarn to be the 'tail'. This will be the beginning of your ball when you're all done.
  2. hold the 6" tail in your pinky/ring finger while you wind a few loops around your thumb (loosely!)
  3. when you've got a few loops, start winding diagonally so you are sort of winding from the bottom of your thumb to your knuckle
  4. this photo shows the diagonal wind
  5. after winding 4-5 times on the diagonal, grab the entire ball and rotate it slightly on your thumb. Continue winding.
  6. shows after some twists. Note that the tail will have to rotate around your thumb. Just watch for it and give it a tug every once in a while to prevent it getting wrapped up in your ball.
  7. Extra note: be very careful not to wind too tight. Apparently winding too tight can overstretch your yarn, which will then relax to it's original shape once knit/crocheted, which can be dangerous for certain projects.
Photos 7-9 simply show the progression as I kept twisting and winding.

Apr 5, 2010

crafts: strange behaviour

tiny
tiny, by me

As you already know, I started actively using Ravelry a few weeks ago, and it's shifted my behaviour in several substantial ways.
  1. I now have a forum I visit multiple times a day, and check obsessively to see if anyone has replied (appreciate me, please!). This of course means that I can no longer nag Kyle about spending so much time on NeoGAF...
  2. I crochet, obsessively. I spend all my spare time (and even some non spare time) crocheting, and I've started writing patterns too. Before Ravelry, I crocheted because I had promised people that I'd make them afghans. Now I crochet because I want to CREATE.
  3. I have turned my photography towards more... practical matters. I spend a lot of time photographing my crafts, and I spent an obscene amount of time photographing my stash (i.e. yarn collection). Who takes photos of their yarn? I do I do!
rainbow swirl
rainbow swirl, by me

Apr 2, 2010

green: vermicomposting


I learned about Vermicomposting when I stumbled upon Sustainable Dave's 365 Days of Trash. I watched a video or two, read up a bit, and eventually convinced Kyle (the eternal skeptic) to give it a chance. We bought a Worm Factory online (can't remember the store we bought it from, but I quickly Googled it and it's available at All Things Organic). We got a 4 tray system, but I think we could have done with a 3 tray system since wormies don't like most of the produce we throw out (citrus peels, fresh herbs, onions, garlic). There was one point when we had 2 or 3 trays full, but never 4.

It's definitely been a trial-and-error adventure. I was uber-excited when we first got it, and despite warnings of "don't overfeed!" I fed them too much and the wormies just huddled up and hid in a corner. Then I added fresh herbs (none of the books tell me I can't!) and onions (even though the books told me I can't...) and the population crashed. My theory for this is that the worms don't actually eat the veggies; they eat the bacteria (& other microbes, etc) that feed on the veggies, and onions & fresh herbs are antimicrobial... We decided to leave the composter alone and we just started throwing our veg scraps in the normal garbage for a few weeks. Eventually, the wormies worked through the food I'd given them and the population exploded (that's a good thing).

I had a few brief moments of panic when I noticed that there were loads of other types of bugs in the worm factory. I didn't know what I was breeding, and I didn't want them hurting my wormies! Fortunately, I was working in an invertebrate lab at the time so I brought a few specimens in and took a look under the microscope with Michelle. Turns out they were collembola and mites and they're good for worm factories!


My next obstacle was that I didn't realize how quickly worm tea filled up (worm tea = the liquid that accumulates in the bottom of the worm bin ... essentially worm pee/mucus?). It turns out that a combination of lots of organic-rich standing water + a lingering population of drainflies (Psychodidae) hanging out in the apartment means that you end up with your very own breeding colony. It got really bad in Windsor and I had to borrow a "pooter" (i.e. aspirator) from work to collect them off my kitchen wall and release them outside.


The next obstacle was moving them, but this one didn't turn out to be that difficult. We stopped feeding them for a while so that they would eat the food that they had and reduce the weight of the worm factory a bit. Then we added some bread/rice a day before we moved because digesting carbs increases heat and they'd be living in the truck the whole time. And lastly, it was above freezing when we moved so no problemo.

Our most recent obstacle has been a major one with some serious consequences. At some point we ended up breeding fruit flies but I think they mostly went away over the course of winter. However, we ended up with a species of fly that looks a lot like bigger fruit flies, but they like really stinky things like kitty litter and rotting onions. These guys have proven impossible to get rid of, thus far. They're not sooo bad, once we figured out a few techniques for managing them (i.e. set up fly traps, avoid feeding the wormies too frequently b/c it lets the flies out, add one plastic layer filled just with paper which makes it hard for the flies to get out). Unfortunately, because of the flies, I haven't been able harvest/sort through the compost very often (because the flies escape in waves when I start rooting around in the compost). My solution for this was to wait until the outside was reasonable (0 Celsius) and root around in the compost then, because the flies would die, hopefully, but the wormies should stay OK. Turns out NO wormies do not like that temperature and I killed nearly all of my full-grown wormies. I still have some babies and I hope they will grow up big and strong, but right now my population is seriously crashed. I think we've almost got the drain fly problem under control (yes, they moved with us to Quebec), and I think the other fly problem will be reduced when I can leave the compost outside for a few days at a time.

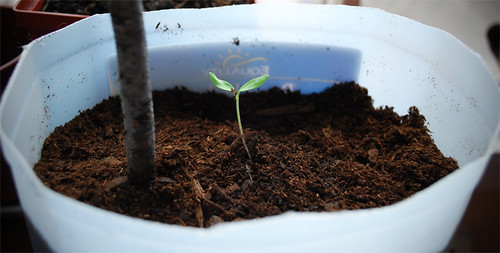
Despite all the trouble it's given me, I really like having the worm composter. It's kind of fun to have the challenge and keep a little community living (although I seem to have exterminated my collembola somehow too). And it's nice to get rid of a lot of our veggie scraps without throwing them in the garbage. And the unexpected benefit is that I have a nice collection of vegetables growing (mostly tomatoes and peppers, with the occasional ?? plant).

green: way basics recycled, recyclable, modular furniture

Found this on FOKaL. Awesome eco furniture from Way Basics. I definitely want this.


Apr 1, 2010

green: green thumb; brown thumb

day 1
I kill plants. I have a talent for it. I've bought mini basil plants and killed them. I've planted basil plants from seed and killed them. I've killed endive. My sunflowers and wildflowers simply failed to bloom. I kind of suck at gardening. Which is kind of annoying, actually, since I have fond memories of productive gardening with my dad when I was a kid. Guess it was all my dad's doing and not mine. (OK sidebar because I just remembered: I had a dream last night that I heard white-throated sparrows in my backyard at my OLD house in Unionville. When the bird(s) landed on the fence posts, I could see they were leg-banded, but when I looked closer it was apparent that one of them had 3 coloured film canisters on its legs as colour bands - and of course it didn't occur to me until after the dream that this WTSP must have been the size of a large goose or something. Yeesh, creepy).

Well, I think my brown thumb has (temporarlly, at least) been turned into a green thumb. I have a vermicomposter (more on that later), and every time I try to add fresh compost to my plants, I end up growing tomatoes. Tried to grow daisies last year for my wedding... ended up with stunted daisy sprouts and a giant tomato plant. I also get peppers, and the occasional mystery plant. Thus far, I have not grown anything to proper fruition. The tomato plant got close but it got cold and we moved so I never saw red tomatoes. I planted the peppers too close together so they were stunted.

The truck ride to Québec killed/damaged a bunch of my (insert name of that ubiquitous viney plant here) plants, so I had to do some trimming, resprouting, and repotting. Some of this repotting involved compost. Which means I got tomatoes. Lots of them. Instead of treating them as weeds, I've been replanting them. So far I've got one massive tomato plant (>3'), one smaller one (>1'). I've got other stuff growing too but I'll leave that for another post. These tomato plants grow FAST. Several inches in a week fast.

So, the purpose of today's post is to start a series of photos of my most recently transplanted tomato plant (I'm working on the assumption that it is indeed a tomato).

Here it is, week one, day one (March 31, 2010):

Mar 31, 2010

green: old shoes and gym gear

I've recently hit the end of the road with two pairs of shoes. The "leather" (I think it's pleather...) has cracked and is falling apart in places. Since one of the pairs is boots and I need my boots to be waterproof, this crack renders them essentially useless. But what do I do with them? I don't feel right giving them to Value Village. Why would anyone else want my nasty-ass cracked shoes? Well I found this website online, which gives suggestions on what to do with old gym gear. Since they mention shoes, I'm pasting the ideas here.

Follow Women's Health's recent tips on giving your gear a second life:
Recycle your shoes through Nike Reuse a Shoe program.
Recycle any Patagonia clothing.
Recycle or donate yoga mats through the Recycle Your Mat initiative.

Source: Fit Sugar

Mar 29, 2010

crafts: cutest bootie EVAR!

I just finished the cutest little baby bootie and I NEED to share it with y'all. Well, I don't know how many people read this, but I feel like putting it on a blog satisfies my need to run around like a crazy person showing it to everyone I know (which I have also done, actually...).
The lighting was bad with the photo, but checkitout!

I made it this morning. Now I need to spend some time perfecting the pattern so I can churn out hundreds. And, yes, I do want to make a larger version for myself. How cute would this be in adult slippers? I can't justify spending $70 on real chucks so I feel like this would be a pretty decent second-best ;)
You can read more about it on Ravelry, too.

Mar 28, 2010

recipe: nic & kyle's vegetarian chili

(Originally emailed Apr. 2, 2008)

our recipe!
our recipe!, by LG Weddings

I've added two new people to the list. Julie, from my lab (I've added you in case you find some recipes for your sis or for CR), and Dane who I know from Laurier people (hey, you said you wanted a recipe!). The background info: I (try to) send out a vegetarian recipe every week, seeing as Kyle and I usually try at least 1 or 2 new recipes per week, and I hope that someone out there actually finds something they like.

Today I will share with you my recipe for vegetarian chili. I grew up with my mom's chili recipe: simple, tasty, hearty, but full of meat. And it turns out that it doesn't work well as chili when you just omit the meat. I have tried time and time again to make vegetarian chili and it nearly always ends up tasting "off" and being overly liquidy. So I did some investigative work (including Wikipedia and some recipe sites), plus some trial and error, and finally settled on a vegetarian chili recipe I like. Kyle says it's the best food I make. I don't have a meat substitute in it (I've tried it and I didn't like it), but you could always try that if you wanted. I usually serve this chili with a dollop of sour cream and some shredded cheese. If I'm feeling fancy, I'll chop up some avocado and mix it with lime juice and serve that over top of the chili. I guess green onions would also work as a garnish. We make fresh french crusty bread for dipping.

Some comments from now me (as opposed to me writing in April of 2008). I was searching for this recipe today and I couldn't find it (can't find any recipes in our recipe box since I decided to "re-organize" it. Grr. Then I checked my second go-to spot: my blog! And I realized to my astonishment *gasp* that I haven't posted our chili recipe. As you've already read, Kyle and I developed this recipe together, but the other cool news about it is that we served it at our wedding! The caterer at the Toronto Zoo (Compass Canada) was really great about it and they made our chili for us. How cool is that?

Now as it turns out, Kyle and I have different methods of making this chili. And... his tends to end up better than mine. So I'll intersperse the Kyle Method below.

dinner buffet!
our recipe!, by LG Weddings

Nic & Kyle's Vegetarian Chili
Ease: 1 very easy
Time: 3 somewhat quick (quick to throw everything in a pot, but long time to let it simmer)
Ingredients: easy to get
Source: my mom, plus inspiration from various places

crockpot chili, by me

Ingredients:
  • 3 cloves garlic, minced
  • 1 large onion, finely chopped
  • 1 chili or jalapeno pepper, finely chopped
  • 2 large cans diced tomatoes
  • 2 cans kidney beans
  • 1 can black beans
  • 1 tbsp chili powder
  • 1/2 tbsp cumin
  • 1/2 tsp sea salt
  • 1 tsp brown sugar
  • 1-2 splashes red wine
  • 1/2 tbsp oregano
  • 1 squeezed lemon (or about 2-3 Tbsp of lemon juice)
  • few grinds/shakes of black pepper
  1. Saute garlic, onion and pepper in a bit of oil for a few minutes - until fragrant and onions are soft. But don't brown garlic.
  2. In crockpot or slow-cooker, combine remaining ingredients and add onions and garlic.
  3. Set crock pot to high until chili starts to boil, then turn heat down.
  4. Boil for several hours. Throughout the day, scoop off the liquid that rises to the top and RESERVE. Do this before you stir it because it's easier. (Kyle method: don't scoop off liquid until the very end)
  5. Before serving, mix some (> 1 Tbsp) cornstarch into the mug of reserved liquid and add gradually back into the chili until the chili is thick.
  6. Serve with sour cream, shredded cheese, lime-y avocado cubes, etc. Also, fresh bread.
  7. Yum.